Contact Me:

Friday, January 9, 2015

Rosemary Balsamic Pork Tenderloin

Rosemary Balsamic Pork Tenderloin

I made this today after skipping lunch and then waiting until 8:30 to eat dinner, so even if it turned out horribly I'm sure I would have loved it anyway! It takes quite a bit of time to make (4 hours to marinate, about an hour to cook everything) but it doesn't take much skill or attention so it's a nice recipe to have if you have other stuff to keep you busy in the down time! Here's the original recipe.

For the Pork:
One 1-1.5lb pork tenderloin (not sliced)
1/8 cup balsamic vinegar
1/8 cup olive oil
1-2 crushed garlic cloves
1 tbsp fresh roesmary, chopped
1 tsp salt
1/2 tsp black pepper

For the Potatoes:
2-3 medium red skinned potatoes, scrubbed, diced into cubes
1/2 tbsp olive oil
Salt and pepper to taste 

For the Gravy:
1/8-1/4 cup canola oil or vegetable oil
1/2 heaping tbsp flour
1/2 cup chicken broth
Splash of dry red wine (optional)

Combine all pork ingredients in gallon-size ziploc bag. Be sure that marinade completely covers pork tenderloin and refrigerate for at least 4 hours, turning bag over halfway through to evenly season the meat.

Preheat oven to 400 degrees.

Toss cubed potatoes with oil and salt and pepper and microwave on high for 8 minutes, stirring halfway through. Set aside.

Remove pork tenderloin from marinade and discard marinade. Season tenderloins with salt and pepper. In the largest oven-safe skillet you have, heat 1/8-1/4 cup canola or vegetable oil. When oil sizzles when a drop of water is splashed on the skillet, it is hot enough for the tenderloins. Sear tenderloins about 1-2 minutes on each side. Put skillet in pre-heated oven and cook for 15-20 minutes or until  internal temperature reaches 140 degrees. Remove pan from oven, remove tenderloins to cutting board and cover tightly with aluminum foil. 


Transfer potatoes to skillet and return skillet to oven. Increase oven temperature to 450 degrees and let potatoes roast for 10-15 minutes, flipping halfway through. Remove skillet from oven and transfer potatoes to plate. [I'd do the potatoes differently next time. I found these to be a little greasy and chewy and a bit too sweet for my taste. Any suggestions?]

Add flour to oil in skillet, mix well. Slowly add chicken broth and whisk until smooth, scraping up anything leftover from pork from the bottom of the skillet. Stir in a splash of red wine if you have some.


Slice tenderloins into 1 inch slices, pour gravy over meat and serve.

Enjoy with a nice bottle of wine - mine is courtesy of my good friend and colleague as a thank you for watching his adorable little 9-month old!!

A nice addition to this meal would be my parsley sauce with the roasted potatoes!


Thursday, May 22, 2014

Bruschetta

Bruschetta
So simple, so easy, so delicious. Make as much or as little as you want - for a snack, a meal, or to feed a crowd!


I didn't really measure anything but I'll do my best for a recipe here:
3-4 garlic cloves, minced or pressed
1-2 tbsp  olive oil (I actually used roasted garlic grapeseed oil)
4 Roma tomatoes, seeded and diced
1/4-1/2 onion (any kind, I used yellow)
1/4 cup fresh chopped basil
Salt, pepper, and/or garlic salt to taste

(optional) 1/4-1/2 cup cubed fresh mozzarella cheese

Combine garlic and olive oil. Microwave for 10 seconds, or heat up oil in sauce pan and saute garlic until light brown in color. Combine all ingredients until well mixed. Serve with toasted french bread, crackers, tortilla chips, etc. Enjoy!


Wednesday, May 21, 2014

Tortellini Margherita Salad

Tortellini Margherita Salad


This "salad" is  a delicious, light meal that's great for summer that still fills you up. It's a spin off the classic margherita pizza toppings with some pepperoni mixed in with some cheese tortellini.

The recipe:
1 20 oz bag cheese tortellini
1 cup fresh mozzarella cheese (cubed)
1 cup cherry tomatoes, halved (grape tomatoes were on sale so I got those instead)
1 cup pepperoni (cut into bite-sized pieces)
1/3 cup fresh basil (chopped)
2/3 cup Caesar dressing (I used Newman's Own and it was fantastic)

Cook tortellini according to package directions and set aside to cool while you chop the remaining ingredients. Mix all ingredients together until pasta is evenly coated in dressing and all ingredients are well distributed. Serve and enjoy!!


Saturday, April 5, 2014

Pesto Pasta Salad with Grilled Chicken

Pesto Pasta Salad with Grilled Chicken
This recipe was awesome to make a huge amount and then bring as my lunch for the rest of the week! I did have to re-freshen it with some olive oil every time, but it was delicious and I'd definitely make this one again. I got this, again, from the amazing America's Test Kitchen Quick Family Recipes book

The recipe:
1 pound fusilli
2/3 cup plus 1 tbsp extra-virgin olive oil
2 (6 oz) boneless, skinless chicken breasts
12 oz cherry tomatoes, halved
3 oz (3 cups) baby arugula - I used 1/2 a bag of arugula and spinach


Pesto:
1/2 cup fresh basil leaves
1/2 cup pine nuts, toasted
1/2 cup grated Parmesan cheese
2 tbsp lemon juice (I accidentally bought lime juice and it tasted fine)
1 garlic clove, minced or pressed


Cook pasta according to package directions. Drain, rinse with cold water, and drain again, leaving pasta slightly wet.

Heat a large nonstick pan over medium-high heat for 1 minute. Brush chicken with 1 tbsp oil (or if you don't have a brush, heat up the oil in your pan) and season with salt and pepper. Brown chicken on first side, 6-8 minutes. Flip chicken and cook another 6-8 minutes, until chicken registers 160 degrees. Transfer chicken to cutting board, let cool slightly, and cut into bite-sized pieces.

Process basil, pine nuts, Parmesan cheese, lemon juice, and garlic in food processor until combined, about 10 seconds. With processor running, slowly pour in 2/3 cup oil and process until smooth.

Toss pasta, pesto, shredded chicken, and tomatoes in a large bowl. Cover and let sit for 10 minutes. Immediately before serving, stir in arugula and season with salt and pepper to taste.

Top with extra Parmesan and serve.

For leftovers, add warm water and additional oil as needed to refresh.


Mom's Rhubarb Cake


 Mom's Rhubarb Cake
This is my all-time favorite recipe with rhubarb! My mom has a rhubarb plant that was originally divided from my great-grandfather's garden! She makes this cake way better than I do but it was still fantastic when I tried for the first time this week! I was also so excited to get baking that I didn't take any pictures until after I already had a slice. Or three. This cake also tastes a lot better the day after you bake it, so if you can stand to wait a whole day before eating a slice (which I can't) it'll be much better!

The recipe:
2 cups flour
1 tsp Baking soda
1/2 tsp Salt
1/2 lb (2 sticks) butter, softened but not melted
1 1/2 cups brown sugar
1 cup milk
1 egg
1 tsp Vanilla
2 cups diced rhubarb

Crunch topping
1/2 cup granulated sugar
1 tsp cinnamon
1/2 cup coconut (optional)

Preheat oven to 350°. Grease and flour a 13x9in pan and set aside.

In a small bowl, sift together flour, baking soda, and salt. 

In a large bowl, beat butter and brown sugar until smooth. Stir in milk, egg, and vanilla. Your mix will look very soup-y at this point. Slowly stir in flour mix until just incorporated, being careful not to over mix. Finally, stir in rhubarb.

Transfer mix to prepared pan and smooth until even. Sprinkle on topping.

Bake for 40-55 minutes, checking it first at 40 minutes and then in five minute intervals after. Your cake will be done when toothpick inserted in center comes out clean.


Chocolate Banana Muffins - 150 calories!

150 Calorie Chocolate Banana Muffins
I'm not quite sure how the author of the original recipe decided that they're 100 calories, but if I enter this recipe into myfitnesspal.com it comes up as a little over 140. So if you add the chocolate drizzle to the top I bet it'd be around 150!

See the original recipe here!

The recipe:
1 egg
1/4 cup brown sugar
1/3 cup applesauce
1 tsp vanilla
1 cup mashed ripe bananas (2-3 large bananas)
1 cup flour (original recipe calls for oat flour, I used all purpose)
1/2 tsp baking soda
1/2 tsp baking powder
1/2 tsp salt
1/4 cup cocoa powder
Chocolate chips (optional)

Recipe makes 8-10 regular sized muffins, or 5 in a big muffin tin
Preheat oven to 350 degrees. Grease muffin tin and set aside. In a large bowl, beat egg, sugar, applesauce, vanilla, and bananas. Mix flour, baking soda, baking powder, salt, and cocoa powder.
Slowly add to wet ingredients and mix until just combined.
Bake for 20-25 minutes (regular sized muffins) or 25-30 minutes (big muffins), or until toothpick comes out clean.

Optional if you'd like a couple extra calories - drizzle with melted chocolate. I found these were so sweet and delicious it didn't need it!

Monday, March 24, 2014

Crispy Red Potato Wedges

Crispy Red Potato Wedges

This side is so easy I hardly use a recipe for it! It's great for making as little or as much as you want. Try it with Parsley Sauce!

The "recipe"
  • Red potatoes (I'll use about 2 medium-sized ones for myself. This gets me through a meal with a few leftovers)
  • Olive oil (2-3 tbsp, divided)
  • Salt to taste
  • Pepper to taste

Cut potatoes into 1-inch wedge slices. This part is harder to figure out than it seems, but as long as most of them are about the same size you should be okay. Start by cutting the potato in half and then cut each half at a diagonal in about 1-inch slices. 

Place potatoes in a microwave-safe bowl or container. Drizzle with olive oil and sprinkle on some salt and pepper to taste. Toss with your hands. Loosely cover with container lid or paper towel.

Microwave for about 6 minutes, stirring halfway through. 

Meanwhile, heat up about a tablespoon or two of olive oil in large skillet. The oil is heated enough when just smoking, or when a drop of water splashed on it lightly sizzles. Once potatoes are finished microwaving, stir, and place in skillet in one even layer. If you're making a lot of potatoes you may have to do this in batches. 

Leave potatoes on skillet without stirring for 3-4 minutes or until golden brown. Gently flip and leave without stirring for another 3-4 minutes, until other side is also golden brown. Transfer to dry paper towel and serve warm. These are amazing with a steak and Parsley Sauce!

Friday, March 21, 2014

Making Half a Recipe

I always find that I'm cutting recipes in half (or in quarters) because most recipes are designed for a 4-person family. I can't eat that much food, even if I share some with the rats (pet rats) and save it for leftovers! Here's a nice cheat sheet I found on pinterest:

Wednesday, March 19, 2014

Chocolate Cake with Chocolate Hazelnut Mousse Filling

Chocolate Cake with Chocolate Hazelnut Mousse Filling

Let me just repeat the name of this cake one more time so it really sinks in. Chocolate. Cake. with Hazelnut. Mousse. Filling. All I can say about this is wow! If I had one more day to live and I had to choose my last meal, I'd have a steak and then eat that mousse until my heart stopped.


I made this cake for my lovely cousin Emili's 23rd birthday! This is us showing our cousinly love... after some bonding over tequila...

The recipe is a lot of work and took me almost the whole day to prepare it, with a couple hour break for yoga/lunch/shower while the cakes cooled. Part of it was because I forgot a step and my first cake was destroyed when I tried to take it out of the pan.... BUT it was definitely worth it. You always have the option of substituting boxed chocolate cake mix for the cake part of the recipe, but I think it's much more rewarding and delicious if you make it yourself.

See the Original Recipe here

The recipe:
Cake:
1 3/4 cups flour
2 cups granulated sugar
3/4 cup unsweetened cocoa powder
1 1/2 tsp baking powder
1 1/2 tsp baking soda
1 tsp salt
2 eggs
1 cup whole milk (Vitamin D milk)
1/2 cup vegetable oil
2 tsp vanilla
1 cup hot water
Filling:
8 oz heavy whipping cream
8 oz cream cheese, room temperature
3/4 cup Chocolate Hazelnut Spread (a.k.a. Nutella)
2 cups powdered sugar
1 tsp vanilla
Topping:
Leftover Chocolate Hazelnut Spread
Chocolate Hazelnut Candy (Ferrero Rocher is the best) - a 12 pack gets you enough for the topping plus a couple to snack on as you're baking :)

Preheat oven to 350°. Spray 9" round cake pans with nonstick spray. Line bottom of pans with parchment circles, cut to fit pan. Spray pan again, coating the parchment paper. Seriously. Use the parchment paper. I forgot the parchment paper the first time and my cake turned out looking like this:


Combine flour, granulated sugar, cocoa powder, baking powder, baking soda, and salt. 
Add in eggs, whole milk, vegetable oil, vanilla, and water. Once all ingredients are mixed together turn mixer speed up to medium low and mix for 2 minutes.

Divide batter evenly among 2 cake pans - or if you only have one pan like me, fill pan about halfway and save the rest for after the first one is done. Bake for 25-30 minutes, until center is set and toothpick comes out clean.

Allow to cool in pan for 10 minutes and then remove from pan and cool completely on a wire rack.
With whisk attachment, beat your heavy cream until stiff peaks form, 1-2 minutes. Transfer to another bowl and place in refrigerator until ready to use.
Beat cream cheese and chocolate hazelnut spread until smooth. Slowly add in powdered sugar and vanilla and beat until smooth and incorporated.

Fold in reserved whipped cream.
           

Level one of the cakes, so it isn't domed. One of my cakes was already pretty flat, so I skipped this step. Spread Chocolate Hazelnut Spread on top of cake.
Spread half of the Filling mixture on top, spreading out to 1 inch away from edge of cake. Top with the other cake. 


 Place remaining filling mixture on top.

Top with Chocolate Hazelnut Candy. 
Microwave remaining chocolate hazelnut spread for 30-45 seconds until pourable consistency and drizzle over top. I found this step really difficult so I treated the spread like splatter paint....

Store in refrigerator until ready to serve.
Enjoy!! Happy Birthday Emili!

Tuesday, March 18, 2014

Burger for One

Burger for One

These burgers are juicy, flavorful, and so quick and easy you could make these any night you want! I got so excited to start cooking that I forgot to take pictures of the first couple steps! This is another one borrowed from the amazing America's Test Kitchen Quick Family Cookbook. Adjust as you'd like to make more burgers!

The recipe:
1/4 lb ground beef
1/2 tbsp whole milk (Vitamin D milk in the store for some reason)
1/4 slice white sandwich bread (I use an extra burger bun so I don't have to buy a whole extra loaf of bread)
1/4 tsp steak sauce
1/8 tsp salt
1/8 tsp pepper 
1/2 tbsp vegetable oil
Hamburger bun 
Slice of cheese (I like white American from the deli at the grocery store)
Toppings of your choice

(optional)
1/8 tsp red pepper flakes if you like a little spice

Mash milk and sandwich bread with a fork until it forms a paste. Mix in ground beef, steak sauce, salt, pepper, and red pepper flakes using your hands. Toss the meat between your hands to form a loose ball and then pat down lightly to form a 1/2-inch thick patty.

Heat oil in small non-stick skillet over medium heat until just smoking. Lay burger in skillet and cook
until browned on first side, about 4 minutes.

Flip and cook for another 3-4 minutes. Turn off heat but leave burger and skillet on warm burner. Top burger with cheese and continue cooking until cheese is slightly melted. Put burger on bun and top with your favorite toppings - I chose ketchup, ranch, and tomato! OR try topping it with my delicious Spinach Artichoke Dip!

With a side order of Mac & Cheese for One please!

Enjoy!


Wednesday, March 12, 2014

Parsley Sauce

Parsley Sauce

This stuff is awesome! It's quick, simple, and makes a bunch so you can freeze some and store it for later. You can use it for so many different things and it's so tasty. I've used this as salad dressing, as a steak sauce, a dip for french fries, as a replacement for mayo on sandwiches, and I'm sure there are a thousand other things you could pair this with. 

The recipe:
1 cup fresh parsley leaves
1/2 cup extra-virgin olive oil
1/4 cup chopped red onion
1/4 cup red wine vinegar
2-4 garlic cloves, minced
1 tsp salt
1/4 tsp red pepper flakes

(optional)
1 tsp-2 tbsp water

Combine all ingredients in food processor and blend until well combined, about 20 seconds.


I left water as optional, depending on what you're using the sauce for. If you want it thicker and more spreadable for sandwiches or like a dip, omit the water entirely. If you want a vinaigrette-like sauce, add as much as 2 tbsp water, and for anything in between start at 1 tsp and add until you reach the desired thickness. For the batch in the picture I used 1 tsp of water.

Enjoy!

Monday, March 10, 2014

Melt-in-your-mouth Pumpkin Cookies

Melt-in-your-mouth Pumpkin Cookies

 These cookies are honestly the best things I've ever baked. The original recipe makes way too much so I've cut it in half. Unless you're baking for a crowd, I'd recommend leaving this cut in half. I baked the full recipe for my family on Thanksgiving (there are 11 of us and we gave away 2 plates of them) and there were still leftovers! These cookies are soft, gooey, and literally melt in your mouth. I've added a few ingredients from the original, and added a step to incorporate the flavors of the spices into the pumpkin and to get rid of the slight tinny taste of the canned pumpkin. I've also developed my own frosting recipe, or you could simplify it and use my Cream Cheese Frosting recipe (I'd cut the full version in half).

The recipe:
1 cup (2 sticks) butter, softened
1 cup granulated sugar
1 tsp baking powder
1 tsp baking soda
1/2 tsp salt
1/2 tsp ground cinnamon
1/2 tsp ground nutmeg
1/8 tsp pumpkin pie spice
1/8 tsp allspice
1 egg
1 tsp vanilla
1 15-oz can pumpkin (NOT pumpkin pie filling)
2 cups all-purpose flour

Frosting:
4 tbsp butter
4 oz cream cheese
1/8 cup packed light brown sugar
1 tsp vanilla
3/4-1 cup powdered sugar
Splash of milk

Preheat oven to 350 degrees. 

Heat an empty skillet over medium-low heat. Add canned pumpkin, cinnamon, nutmeg, pumpkin pie spice, and allspice. Stir until combined and just heated through. This gets rid of the tin flavor of the pumpkin and brings out the flavors of all the spices.

In a large bowl, beat butter until smooth. Add granulated sugar, baking powder, baking soda, and salt. Beat until combined. Beat in egg and vanilla. Beat in pumpkin/spice mixture. Slowly beat in as much flour as you can with the mixer and stir in remaining flour with a wooden spoon.

Drop by heaping teaspoons 2 in apart on ungreased cookie sheet, or on parchment paper if you want to skip cleaning the cookie sheet. Bake for 10-12 minutes or until tops are set. Let sit on cookie sheet for 2 minutes, transfer to wire racks to cool completely.

For frosting: melt butter, cream cheese, and brown sugar in saucepan or microwave and combine until melted and smooth. Stir in milk and vanilla. Beat in 3/4 cup powdered sugar until smooth. Add more powdered sugar if you like a thicker, sweeter frosting. Spread frosting on cookies and sprinkle with additional cinnamon.

Enjoy!!

Sunday, March 9, 2014

Bluephie's Carrot Cake

Bluephie's Carrot Cake

If you haven't been to Bluephie's on Monroe Street, you're definitely missing out. Go with an empty stomach because you have to get dessert after your enormous entree after the greatest bread roll appetizers with sun dried tomato butter.

So I got a Bluephie's cookbook for my birthday a few years ago and this carrot cake is to die for. It's moist, creamy, flavorful, and the restaurant boasts that it sells seven 18-pound cakes to their customers each week. This recipe is for a smaller cake (two layers as opposed to six layers).

The recipe:
3/4 cup vegetable oil
2 eggs, beaten
1 1/8 tsp vanilla extract
1 1/2 cups sugar
1 1/2 cups flour
1/2 tsp salt
1 1/4 tsp cinnamon
1 1/4 tsp baking soda
3/4 cup shredded coconut
1 1/2 cups shredded carrots
1/2 cup (one 8 oz can) crushed pineapple 

See Cream Cheese Frosting recipe

Preheat oven to 350 degrees. Spray a 10-inch round cake pan with cooking spray. Cover bottom of pan with round piece of parchment paper.

Mix oil, eggs, and vanilla until well blended. Slowly add sugar, flour, salt, cinnamon, and baking soda. Stir in coconut, carrots and pineapple until just incorporated, Spread mixture in prepared pan.

Bake for 1 hour  or until toothpick inserted in center comes out clean. Check at 5 minute intervals if toothpick does not come out clean.

Cool completely on wire rack, cut into two layers and frost center layer and outside with cream cheese frosting. Optional: cover with more shredded coconut. Try not to eat the entire cake at once (it's that good).

Cream Cheese Frosting

Cream Cheese Frosting

I always find that recipes put in WAY too much powdered sugar, so I've adapted my recipe from the Bluephie's Carrot Cake recipe!

The recipe:
8 oz cream cheese, room temperature
1 stick (1/4 lb) butter
1 cup powdered sugar

Blend butter and cream cheese until all lumps are gone, then add sugar and blend until smooth.

This recipe will cover a 10-inch round cake (enough for 10-14 servings). If I'm using this recipe for Pillsbury crescent rolls (either making cinnamon rolls or chocolate crescent rolls), I cut it in 1/4 - 2 oz cream cheese, 2 tbsp butter, and 1/4 cup powdered sugar.

Spicy Shrimp with Fettuccine and a White Wine Sauce

Spicy Shrimp with Fettuccine and a White Wine Sauce

This one is a treat! If you have some time on your hands and some fast-paced kitchen skills, this recipe isn't too hard. One time I made this one I almost burnt down my kitchen and my arm. I wasn't paying attention and left my burner too hot for too long before putting oil in. The oil jumped back out of the pan onto my arm (and all over my cookbook, but I think the sign of a good cook is a messy cookbook). And since this recipe calls for your oven rack to be super close to the broiler, I got my nice white towel a little too close as I put the shrimp in and now it has a nice singe mark across the top. My smoke alarm (which is up a flight of stairs in my bedroom) started to go off and I was basically a crazy person running around my apartment with alarms going off and oil burning my arm.

But the result was fantastic so I think it was worth it :)

This recipe is a combination of two recipes from the America's Test Kitchen Quick Family Cookbook. They guard their recipes like they're gold (which most of them are) so I have adjusted the recipes just a little bit. The first is Broiled Shrimp Cocktail [the original recipe makes this with a Creamy Tarragon Sauce, but since I'm using the shrimp in pasta, I won't make the sauce], and the second is Shrimp Fra Diavolo with Linguine (I use Fettuccine and replaced this shrimp recipe with the first one).

Double the recipe if you're making for more than one person - this one got me two small meals.

The recipe:
Shrimp:
1/2 pound large shrimp, uncooked, peeled, and deveined
1/4 tsp salt
1/4 tsp ground coriander
A pinch of pepper [less than 1/8 tsp]
A pinch of sugar [less than 1/8 tsp]
A pinch of cayenne [less than 1/8 tsp]
A pinch of crushed red pepper [less than 1/8 tsp]
1/2 tbsp extra-virgin olive oil

Sauce:
2 tbsp extra-virgin olive oil
2-3 garlic cloves, minced or pressed
1 14 oz can diced tomatoes
1/2 cup dry white wine (Pinot Grigio was a bit too sweet so I tried Chardonnay and it was much better!)
1/4 tsp sugar (I would omit this next time I made it - too sweet for me!)
1/4 tsp salt
1/4 tsp red pepper flakes (omit if you don't like too much spice)

Pasta:
Fettuccine - as much as you want to make, I used a handful about half an inch in diameter.
Salt

Boil some water for your pasta and cook according to box directions. Add salt to the boiling water to flavor the pasta. 

To prepare the shrimp: peel the shrimp by pulling off the outer shell, starting at the head, and pull the tail off by pinching at the top of the tail and pulling straight down. I've never deveined shrimp so if you're doing that yourself, Google is a better source than me. Lay on paper towel and pat dry. Combine salt, coriander, pepper, sugar, and cayenne into a small bowl. Add shrimp, then oil and toss with your hands until all shrimp have an even coating. Cover and refrigerate until you're ready to cook them. (They cook REALLY fast so save it for the end).

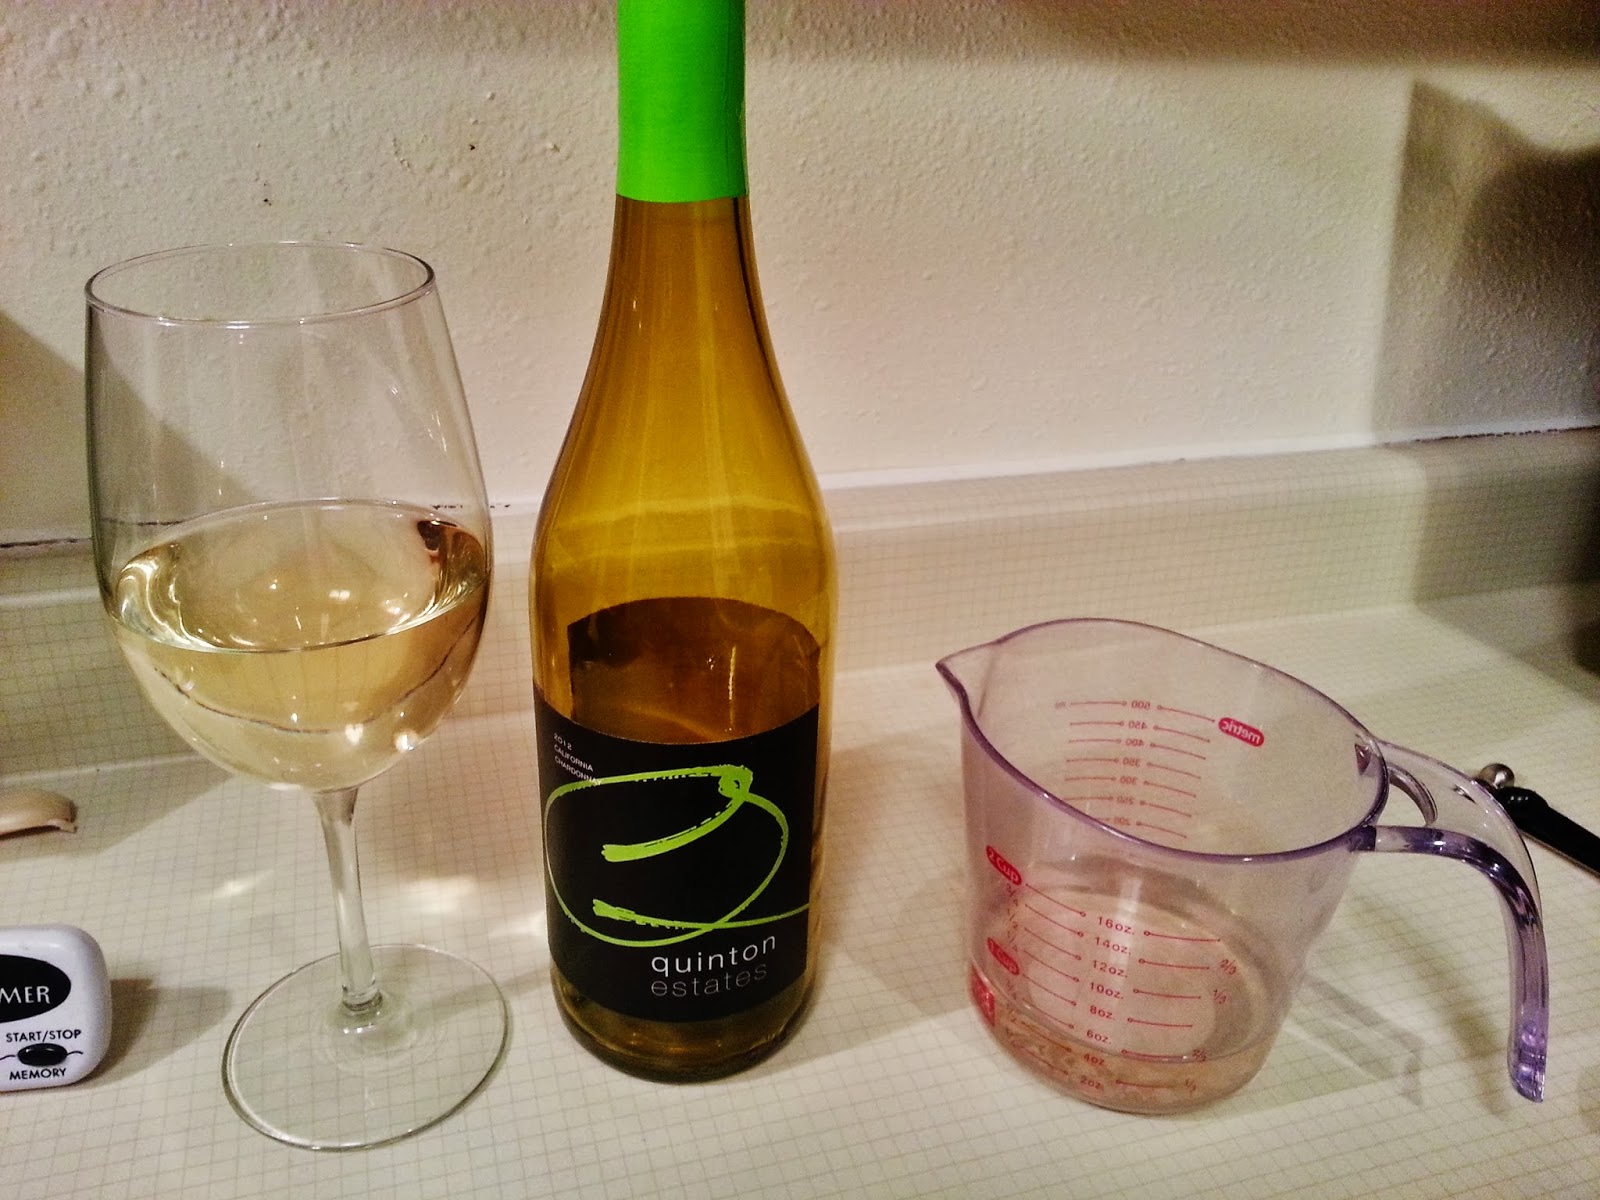
For the sauce: heat up oil in large skillet over low heat and add garlic until garlic foams and is sticky and straw-colored. Stir in tomatoes, wine, [sugar], salt, and pepper flakes. Increase heat to medium-high and simmer until thickened, about 8 minutes. When I made this with Chardonnay, it was very good! I used Quinton estates 2012, from Brennans Market (and drank some while cooking!). Your sauce will be thick enough when you can run your spoon across the skillet and see the bottom of your pan.


If your pasta is almost done and you've started simmering your sauce, cook the shrimp. Adjust your top oven rack so that it's 3 inches from the broiler and turn broiler on to high. If your top rack doesn't get that high, place a rimmed baking sheet upside down on your oven rack to get it closer. Spread shrimp in a single layer on baking sheet (line with aluminum foil if you don't want to wash it). Broil shrimp until opaque and edges begin to brown. The original recipe says 6 minutes, but I've found that they finish up in about 4 minutes. These shrimp are so tasty that I never get all of them to the plate... They're so good to just eat as a snack! Especially if you like drinking wine while you cook, it's a nice combination.

After everything is done, combine pasta and shrimp into skillet with sauce and stir until just combined. Transfer to bowl and serve. I think I'm going to make this one tonight, so I'll post pictures later if I don't burn down my apartment!(Update: this went much smoother this time and nothing burned)